Are you planning a hiking trip but aren’t sure if you’re fit enough to make it? Long hikes with steep elevation gain can be hard for even the fittest of hikers. Your hamstrings burn, calves get tight, and your heartbeat races. Training with a hiking workout plan is one of the best ways to prepare.
So how do you train for hiking? We’ll go over different strength exercises, how to improve cardio, increase joint mobility, and much more to prepare you for the hikes you’ve always dreamed of doing.

Sure, hiking a once or twice a week in preparation for a huge hike is important, but stopping there may not be enough. If you really want to prepare and crush these difficult full-day hikes, you should consider strength, cardiovascular, mobility, and balance training to your hiking workout plan.
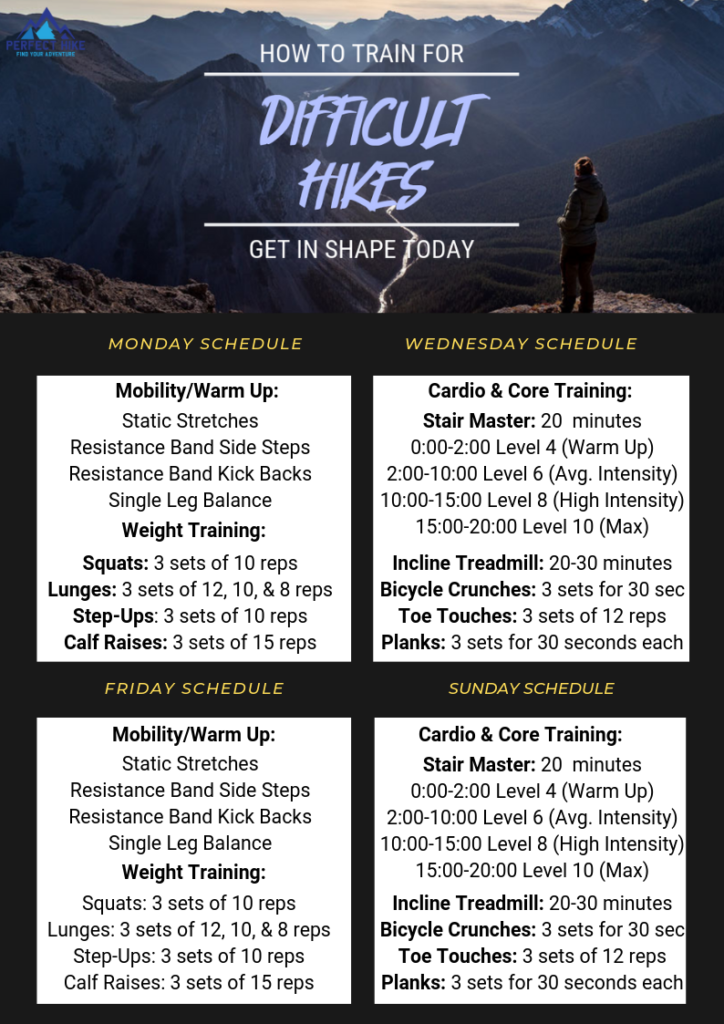
In this blog, we’ll put together a comprehensive 3-month hiking workout plan to get you ready to conquer the toughest of hikes. Download the Perfect Hike Workout Plan below and continue reading to learn more about the exercises, how to perform them correctly, and the benefits they provide for hiking.
Download – Perfect Hike Workout Plan PDF

A great example of a hike you would train for is the 15 mile Half Dome Trail. Half Dome contains hundreds of steps, constant elevation gain, countless switchbacks, and oh yea….. the cables at the dome. If you plan on doing this hike without being in shape, well, good luck. You can check out my Complete Guide to Hiking Half Dome and give yourself something to train for if you’re up for the challenge.
Strength Training:
Listen, you don’t need to be in the best shape of your life to successfully finish difficult hikes, but efficient strength training is essential. Below you’ll find the best strength training exercises for hikers that closely simulate trails.
1. Weighted Squats

Squats are regarded by many fitness experts as the best all-around and most beneficial exercise for your body. Squats are a full-body workout, not just your legs. You will activate your hips, glutes, quads, hamstrings, and sneakily strengthen the core and back. Squats also help improve balance and coordination, as well as bone density.
What Squat Variation is Right for You?
There are plenty of squat variations to choose from including bodyweight squat, dumbbell squat, barbell squat, kettlebell squat, etc.
First things first, determine where your leg strength is currently at so that you can choose the best squat variation to focus on. If you’re just starting out and working your way up, the bodyweight squat will be for you. Form is essential when squatting, focusing on bodyweight squats first is always a good idea. To perfect your form, take a look at this great video, Squats for Beginners.

Once you feel comfortable and are ready to take the next step, add some weight. Whether it’s a dumbbell, kettlebell, medicine ball or barbell, push yourself and get those legs burning.
Make a goal to increase weight every week or two, even if it’s just 5 pounds. Slowly but surely working your way up is the best way to build muscle.
2. Weighted Lunges

Lunges work multiple muscles in the lower body including your hamstrings, quadriceps, glutes, hips, and calves. Your back and abdominal muscles are also activated as they work as stabilizers during this exercise.

There are many different variations of lunges that you can do, reverse lunge, sideways lunge, overhead lunge, and many more that you can see by watching this great video on Lunge Variations. Lunges are one of the best strength exercises that you can do to prepare for long elevated hikes.
Below you can watch my grueling ascent up the subdome stairs right before the Half Dome cables. Lunging up each stair one by one was agonizing, but doing lunges at the gym was a great way of training for me.
3. Weighted Step-Ups

Weighted step-ups are yet another exercise that will simulate elevation gain and prepare you for long difficult hikes. Step-ups target the quadriceps, hamstrings, and calf muscles while also requiring you to focus on your balance and stability.

If you haven’t done step-up exercises before or haven’t in quite a while, it’s best to ease your way in. Start with what you feel most comfortable with. Use smaller platforms if you’re not confident in your balance and stability just yet. Starting slow and gradually increasing height and weight every few days/weeks is the best way to improve. Use anything you can get your hands on for weight, dumbbells, medicine balls, kettlebells, etc.
4. Calf Raises

If you’ve done moderate to strenuous hikes in the past you’ll know all about the burning sensation you can get in your calves. Calf strength is very important when training for hikes, being able to tolerate steep switchbacks or climbing portions of a hike will make a huge difference when on a trail.

The soleus and gastrocnemius are the two main muscles in the calf. Both are put under intense pressure when climbing a mountain. Calf raises help to strengthen both of these muscles as well as prevent common hiking injuries like achilles tendonitis and plantar fasciitis.
Cardiovascular Training:
Cardio training is critical if you want to go the distance on a long strenuous hike. Ask yourself what’s the longest hike you’ve ever done? How difficult was it? Is the hike your training for even tougher?
In this section we’ll focus on specific exercises you can utilize at the gym to push your conditioning to the next level. Everyone has busy lives with work, school, family, etc. but if you can dedicate 45 minutes 3 or 4 times a week to this routine, you’ll be ready to tackle the toughest of hikes.
1. Stair Master

Stair master, stair machine, stair mill, it goes by many names but no matter what you call it, the workout you get on this thing is fantastic. This machine will simulate an intense hiking workout and leave your lower body burning!
The stair master is a great example of a cardio workout that doesn’t need to take 20-30 minutes like some treadmill or stationary bike routines. If you push yourself with 10-15 minutes of intense stair climbing you’ll receive a much better all-around hiking workout while emulating stairs or switchbacks that almost all long hikes will have.
All Stair masters aren’t the same so you’ll need to find which settings and speed work best for you. A great stair master hiking workout is to alternate between rigorous and calm speed sets on the machine. We’ll talk more about specific stair master training routines later on, but if there’s one cardio exercise to add to your hiking workout plan, this is the one!
2. Incline Treadmill

Using the incline feature on the treadmill is often overlooked, but it’s perfect when training for hiking. Most trails will consist of a steady or serious incline depending on where you’re hiking.
The incline of the treadmill stretches your calves which helps build lean muscle much more than a flat treadmill would be able to. The steeper you set the incline, the more activated your calf muscles will be and the more you’ll benefit.

Extra Tip: Depending on the treadmill, some have modern features that simulate actual hiking trails and will adjust the incline of the treadmill throughout the simulation. This is a great way to practice hiking without having to go to an actual trail.
3. Practice Hikes

Nothing will prepare you better than actually going out and hiking! Depending on your location, look for moderate hikes to do on the weekends or whenever you have free time.
Above all else, this will give you an accurate measurement of your endurance out on the trail. If you have any trails near you with moderate to high elevation, go out and see how difficult it is for you to complete. If you’re training for a 15 mile out and back hike with over 3,000 feet of elevation gain but a 5-mile loop practice hike with moderate elevation is challenging then you’ve got some work to do.
Practice hikes will also familiarize your body and muscles with hiking terrain beforehand which is very important. Practice can help ease aches and pains if your muscle memory remembers this type of activity from previous and recent hikes.
Core Training:
Training your core strengthens the muscles in your back, hips, pelvis, and abdomen to work in unity when performing even the simplest of activities. Whether it’s throwing a baseball, taking the trash out, or going for a hike, core training leads to better overall strength, balance, and stability.
Core exercises train the targeted muscles to work in harmony. This leads to better balance and stability, whether on the playing field or in daily activities. In fact, most sports and other physical activities depend on stable core muscles.
1. The Bicycle

Bicycle crunches are a great core exercise that goes above and beyond standard ab crunches. This exercise targets the core muscles rectus abdominis and the oblique while also adding an element of cardio to your hiking workout plan.
Don’t rush this exercise. Speed isn’t important, but your form and extension are. Make sure you’re reaching the full range of motion and really pedal that imaginary bike!
2. Toe Touches

Toe touch crunches work the upper and middle areas of your abdominal muscles. This is a great hiking workout to build your core. Increasing your reps from week to week with this exercise will go a long way for your overall core strength and stamina.
3. Plank Variations

Planks don’t just strengthen your core, they also activate muscles in your lower back, shoulders, and calves. Planks can be a full-body workout if done correctly. Once again, focusing on form is crucial for optimal results. Keep your core tight, back flat, and toes pointed.
Countless plank variations target different sections of your abs. Including side planks, reverse planks, buzzsaw planks, and many more. To view the different types of planks and help you decide which is best for you and your hiking workout plan, check out this great video, 15 Must-Do Plank Variation Exercises.
Mobility & Flexibility:
One of the best ways to improve your mobility and flexibility is by utilizing resistance bands. Resistance bands add resistance to any stretch or exercise. This added resistance requires your muscles to focus on stabilizing and controlling the desired movement.
1. Lateral Side Step
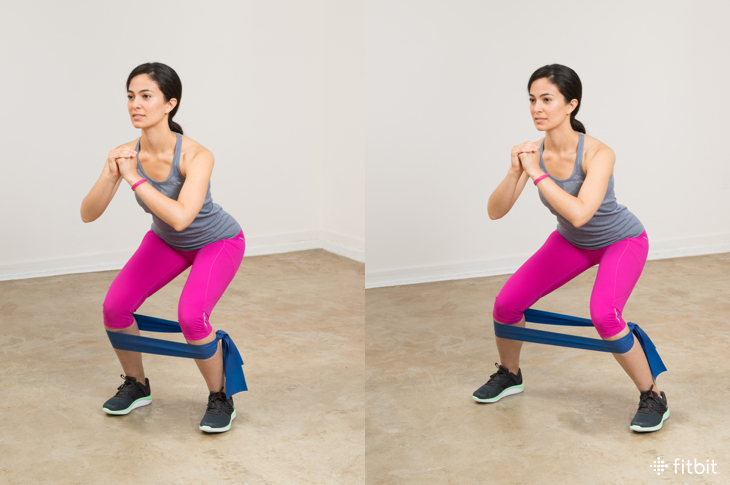
Resistance band side steps are a fantastic activation exercise that really focuses on your hip flexors and glutes. This exercise strengthens your hip abductors and knee joints which can improve overall mobility and stability. To see the correct way to do lateral side steps to achieve the best results, check out this quick video, How To Do A Resistance Band Side Step.
2. Kick Backs

Glute kickbacks with resistance bands are incredibly effective at isolating your glutes and hamstrings. Kickbacks also improve the flexibility and mobility you normally use when walking or jogging.
3. Single-Leg Balance
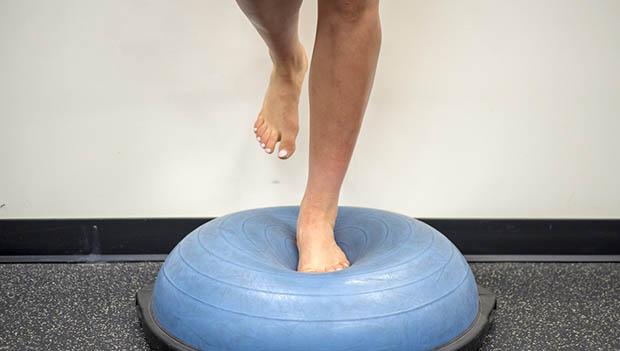
Ankle injuries are the most common injury to suffer when hiking. Most of these injuries occur on the descent down a trail where there is extra pressure being put on the joint. As someone who has twisted their ankle many times when hiking, it’s not fun limping the rest of the way back.
If you’re planning on attempting a long difficult hike, like Old Rag Mountian in Shenandoah National Park, and haven’t done so before, it’s smart to work on strengthening your ankles to avoid injury. Balancing on a single leg strengthens the tendons and ligaments around the ankle joint. This exercise also improves body balance and awareness.
To take this exercise a step further and really work your ankle joints, try this on an exercise ball or a folded towel. The uneven surface will activate the muscles around your ankle twice as much as a flat surface would. Check out this quick video showing an example of a single leg balance exercise on an uneven surface, How to Build Up Ankle Strength.
Static Stretches:

Making time for stretching before and after a hiking workout is essential. Stretching has many valuable benefits including, increasing range of motion of a joint to reduce the possibility of muscle and tendon tears, relieve muscle tightness, and increases blood flow to the muscles stretched.
Stretching after a hiking workout is often forgotten but can make a big difference with how you’re feeling the next morning. One of the biggest benefits of stretching after a hiking workout is that it can help decrease Delayed-Onset Muscle Soreness (DOMS).
1. Hamstring Stretch

The hamstrings are found in the back of your thigh and activate when bending or flexing your knee. Your hamstrings are also responsible for your gluteal muscles which activate when extending your legs for activities like hiking.
2. Butterfly Stretch

The butterfly stretch helps stretch your hips, groin, inner thighs, and lower back. To take it a step further, you can increase this stretch by pushing your legs to the floor or leaning forward to really feel the burn.
3. Quad Stretch

The quadriceps are comprised of four muscles found in the front of your thigh. Along with your hamstrings, the quads are heavily utilized when performing any type of physical activity like hiking. It’s important to make sure you take the time to stretch and warm this muscle group up before jumping into any physical activity to prevent soreness or injury.
4. Hip Flexor Lunge Stretch

Tight hips are very common mainly due to long periods sitting in a shortened position. If you have a job that requires you to sit for a long period of time, then odds are you may have tight hips as a result.
Your hips are involved in so many of the movements of your daily life, not just hiking. Stretching these muscles and improving your range of motion in the hip will lead to better flexibility and overall movement.
Studies show that it takes at least three weeks of consistent training and nutrition before you begin to see results. Patience and discipline are incredibly important when attempting to get in shape. If you follow this hiking workout plan, stay committed, and push yourself, you’ll be prepared to crush the toughest of hikes. Good luck!